Monday, October 18, 2010

Cookies!

I love cooking, as you know, but I need to bake more often. I tend to stick to my stand bys, which hubby loves, but I think something new once and a while would be nice. I was pondering this thought when I was in a baking mood a few weekends ago. So I turned through the marked pages of an ol' favorite of a cookbook and got a few ideas. I, in turn, made some pretty darn good ginger snap cookies.

Giant Spice Cookies


1 package spice cake mix (they didn't have this in my local store and hubby didn't feel like running around town, so I picked a Ginger Bread mix)
1/2 teaspoon ground ginger 1/4 teaspoon baking soda 1/4 cup water 1/4 cup molasses 6 teaspoons vanilla extract In a large bowl, combine the cake mix, ginger and baking soda. Stir in water, molasses and vanilla and mix well. Using a cookie scoop, place 1-inch balls on greased baking sheets. Flatten slightly with a glass coated with cooking spray and sugar. Bake at 375° for 13-15 minutes or until surface cracks and cookies are firm. Remove to wire racks to cool.


Hubby's Rating: Like it! He isn't big on cookies unless they are no bake or peanut butter. He enjoyed these the first day, but didn't touch them after that.


My Take
: I was so excited to see how these turned out--I was hoping for a soft, big cookie.
I mean, look at the picture from the cookbook! And then look at the cookies I pulled out of the oven....bummer! They tasted good, especially with a glass of cold milk, but they weren't what I was expecting! They had a bit too much ginger (probably because I used the ginger bread mix instead of a spice cake mix). But, I am still intrigued by that elusive giant, soft cookie picture, so as soon as I find a spice cake mix, I will try again!

Recipe adapted from: Taste of Home. (Click to see pictures of the Giant (soft looking) spice cookies).


Saturday, October 2, 2010

Lasagna Roll-Ups

I have been spying this recipe for a while now...wondering if it was really as easy as it looked and if there were improvements I could make to the recipe. My husband was gone for 5 days on a training week for work, so I wanted to make him one of his favorite meals, with a twist and I finally dove into the following recipe. I must say, it turned out great and we'll be keeping my changes and making it again!

Lasagna Roll-Ups

8-12 Lasagna Noodles, cooked
4 Cups meat sauce (homemade, or 1 jar store bought)
1 24 oz container cottage cheese
2 cups shredded mozzarella cheese, divided
1 teaspoon each of basil, bay leaves, oregano
1 Tablespoon Italian seasoning
1 Tablespoon garlic powder

Preheat oven to 400 degrees F.Mix cottage cheese with 1 1/2 cups mozzarella cheese, then add basil, bay leaves, oregano, Italian seasoning and garlic powder, stir well. Set aside. Make sure lasagna noodles are cooked, almost to the point of al-dente, but still firm, about 8 minutes in a rolling boil. Take from boiling water and place in a dish with cool water so they do not stick. Spray a 9X13 casserole pan, then lay one lasagna noodle flat in bottom. Top with meat sauce, then cheese mixture. Roll up noodle and place seam down in dish. Repeat with remaining noodles. Top roll-ups with extra meat sauce. Bake at 400 degrees F for 25 minutes. Remove from oven and add remaning shredded cheese. Bake an additional 10 minutes or until cheese is melted and bubbly. Pull from oven and let sit 5 minutes. Serve with a side salad and garlic bread!


Hubby's Rating: Love it! He is a big lasagna fan. He said this hit the spot and he loved the leftovers just as much today!

My Take: I love lasagna too, but it's just a pain to make and can be expensive with all the ingredients I add (using my mom's traditional recipe). I like doing the crock pot lasagna because it's easy--but there is always tons left over so I tend to save that for company. I'm glad I found this recipe! I made 10 roll-ups last night. We each had 2 for dinner last night, then 2 for lunch today. I froze the remaining two to pull for a lunch sometime in the next two weeks or so. I can see myself making a pan of this again very soon and saving some for friends of ours that just had a baby. What made this really easy last night was I used meat sauce that I had prepared in the crock pot and froze 2 or so weeks ago. It had hamburg and sweet Italian sausage. If you want to keep the costs down on this easy lasagna, you could easily cut the meat (which I might do to make a meatless Monday version). I am also looking forward to sneaking some spinach in to this next time for extra nutrients. I'm fiddling with the idea of using the basic recipe but using alfredo sauce, chicken and spinach, too.

Recipe Adapted From TasteofHome.com.

Monday, September 20, 2010

Taco Pizza

Sorry it's been so long since I've posted, but that's life! My new goal is to post at least one new recipe a week.

Last night for Sunday night football I made Taco Pizza. I tried a new recipe for the crust and adapted a recipe for the toppings. We're eating the leftovers tonight and it got a high rating for the hubby, so you know it must be good!


Quick Pizza Dough

1 package active dry yeast
1 teaspoon white sugar
1 cup warm water
2 1/2 cups flour
2 tables olive oil
1/2 teaspoon salt

Preheat oven to 450 degrees F. Dissolve yeast and sugar in warm water. Let stand until foamy, about 10 minutes. Add 1 cup of flour, oil and salt. Mix until smooth. Add remaining flour a bit at a time until dough reaches desired consistency. Let rest 5 minutes. Turn out onto a light floured surface, cover and let rest 10 minutes. Spread onto desired pizza pan and bring up edges to hold extra toppings. Bake for 10 minutes with no toppings. Remove from oven and let rest.

recipe adapted from allrecipes.com

Taco Pizza
1 lb of ground beef or turkey
1 small onion, chopped
1 small-medium sized green pepper, chopped
1 can diced tomatoes, drained
1 can tomato sauce (8 oz)
1 envelope taco seasoning
shredded taco cheese
sour cream

Heat oven (or turn down to) 425 degrees F. In a large, deep skillet (or a dutch oven) brown meat, onions and green peppers. Once meat is no longer pink, add tomato sauce, taco seasoning and tomatoes. Stir and let simmer 5 minutes. Pile toppings onto crust, top with cheese. Bake in pre-heated oven 10-15 minutes (remember your crust is pre-baked). Plate with sour cream for dipping!

Recipe Adapted from Tablespoon.com.


Hubby's Rating:
He loved both the crust and the toppings. Combined rating: Love it! And, the pizza crust was a keeper. I don't think I'll try another!

My Take:
The pizza crust was what I have been looking for. Easy to make, easy to spread, thick, held up well to lots of toppings, tasted wonderful! I will keep this recipe for YEARS to come! The toppings were dynamo! I can't wait to make this again! I followed the original recipe and only added 1 cup of shredded cheese, next time I will add more. We didn't have any sour cream for dipping, but next I make this, I will have some on hand! This would be nice with a salad and some tortilla chips and salsa. So good!

Wednesday, August 4, 2010

Re-use Recipes

Today I'm writing about a way I re-used some of that salsa I made and a way to use up some of that garlic butter I made.

First, the garlic butter. I had about 4 Tablesponns left about 2 weeks ago, so about 5 days after I originally made the garlic butter (don't ask me why it's taken me so long to write this post!). My husband wanted mashed potatoes for dinner, which he doesn't get often because I hate peeling potatoes. So, I compromised and made smashed potatoes--where there is no peeling
required=<3! style="font-weight: bold;">

Smashed Garlic Potatoes for Two
2 medium-large Maine Potatoes (or any kind of potato you like. new potatoes or red potatoes are nice for this recipe)
4 Tbsp Garlic Butter (link to recipe above)
3-6 Tbsp milk (I used skim)
1 tsp onion powder
2 tsp garlic powder
Salt and Pepper to taste

Cut potatoes into quarters and boil until slightly tender (about 10 minutes). Drain in colander. Smash with peels in a bowl by hand (use a potato masher or a fork). Add remaining ingredients (only 1-2 Tablespoons of milk at a time). Mash the way you like them. Serve piping hot!

Hubby's Rating:
Love it! I can't go wrong with mashed potatoes, but like I mentioned...I hate peeling potatoes! If someone has a solution for me that doesn't involve instant, I think we'll try it!

My Take:
Very good! If they were red potatoes, it would have been VERY close to the same potatoes you get in those big chain restaurants! Do those chefs hate peeling potatoes too?


I have lots of salsa on hand at the moment. I had a container in the fridge that needed to be used before we went on vacation, I had 1 chicken breast begging to be used and I had a few veggies here and there. So, I went to a favorite.

Slow Cooker Tex-Mex Chicken (With Rice) (adapted to feed 2 people with minimal left overs)

1 large chicken breast half, skinless, boneless
1 envelope taco seasoning mix
1 Tbsp flour
1 jar salsa (in my case I used about 2 1/2 Cups medium, chunky salsa)
1 Cup frozen corn
1/2 green bell pepper, diced
1/2 red bell pepper diced
1/2 onion, diced
1/2 Cup shredded mexican style cheese (optional)
dollop sour cream (optional)

Combine taco seasoning mix and flour. Coat chicken and place in slow cooker (with remaining seasoning mixture). Top with salsa. Cook on high for 4 hours. Turn to low and add peppers, onions and corn. Cook for 2-4 more hours. Serve over white rice with tortilla chips if desired.

Recipe Adapted from Taste of Home Cookbook--Fast Fixes with Mixes.

Hubby's Rating:
I've been making this recipe for several months now and he always likes it! Like it!

My Take:
I've tried this with different salsas, different veggies, etc. I think with this recipe, the key is to keep it simple. You can cut your chicken into bite sized pieces before cooking, you can use a pork roast instead and then shred it, you can make it all vegetarian and use beans. This recipe is very versatile and we love it!

Tuesday, August 3, 2010

Vacation is over!

I didn't post for a bit because it was vacation time for me! I meant to post before vaca to let everyone know I would be gone, but time got away from me. So, for this week, I'll skip the weekly installments of What I Wanna Try Fridays and Snack Time Saturdays.

Last week for Meatless Monday we had Zucchini Parmesan. I wasn't sure how it was going to turn out, but I was willing to try it! It was really simple, really cheap and really good! The cheesy gooey-ness of it satisfied me and the "meaty-ness" of the zucchini satisfied my husband.

Zucchini Parmesan

2 large zucchini, thinly sliced (into coins)
1 package fresh mushrooms, diced
2 TBS olive oil
1/2 large onion, diced
4 cloves garlic, minced
1 (16 ounce) jar of spaghetti sauce
1 can tomato paste
2 cups shredded mozzarella cheese, divided
1/2 cup grated Parmesan cheese, optional

Preheat oven to 350 degrees F. In a large saute pan, heat olive oil. Add onions, mushrooms and zucchini. Saute until zucchini is almost tender and onions are translucent. Add garlic and saute several minutes longer. Meanwhile, mix spaghetti sauce and tomato paste. Drain vegetable mix, then add to 9X12 Casserole dish. Top with 1/2 of the shredded cheese, then spaghetti sauce, then rest of shredded cheese. Add grated Parmesan cheese if desired. Bake in preheated oven for 15 minutes or until heated through and cheese is lightly browned and bubbly.

recipe adapted from allrecipes.com

Hubby's Rating:
Like it. He isn't a huge fan of vegetables, so getting a Like it out of this dish is good! He hates eggplant and despises eggplant parmesan. He also isn't a big fan of chicken parm, so I knew I was pushing my limits with this one!


My Take
:
I liked this too! It isn't something I'd want every week, but having it a couple times while zucchini is in season would be nice! It's different and the zucchini is substantial enough to make this a main dish. If you're having dinner and you want to stretch it, maybe add eggplant or chicken? Serve with a tossed salad and garlic bread and you're all set!

Monday, July 26, 2010

Salmon

I've mentioned before, my husband loves fish. We had Salmon Friday night for dinner and it was fabulous! I usually bake or broil our salmon with some lemon pepper. But, I wanted something just a TAD bit different. So, after picking up the salmon, I saw the store had Ken's brand marinade on sale. I found the No Sodium Lemon Pepper Marinade and grabbed that. When I got home, I put the salmon in my season and serve container from Tupperware, added 1/2 Cup of the marinade, covered it, tossed it around a bit and put it in the fridge. See the recipe below for more details!
Lemon Pepper Marinated Salmon
1/2 Cup Ken's brand no sodium Lemon Pepper marinade
1 pound fresh salmon
1 fresh lemon

Take salmon and place in a marinade container. Add marinade, shake or toss to coat. Place in refrigerator and let sit for at least 30 minutes--longer if you want a stronger flavor. Preheat oven to 350 degrees F. Place salmon in a foil lined baking dish, skin side down. Top with slices of fresh lemon and bake for 20 minutes.

To check if salmon is done--it should be pink in color, flaky and when you press the back of your fork down onto it, it should give. Fish keeps cooking even after you have taken it out of the oven, thus you need to be careful not to cook it too long. If you want, you can bake it at a higher heat for a shorter amount of time--425 degress F for 10 minutes (for each inch of thickness).

Remove lemon from top and squeeze out juices. Enjoy!

*Note, I don't bother removing the skin because it just peels off once cooked. My husband will sometimes eat the skin (Yuck!) so it doesn't bother either of us. I HATE trying to take the skin off before cooking, thus my method!

Hubby's Rating:
Love it. I seriously can't go wrong with fish dishes or pizza!!

My Take:
Easy, fast and simple. I served it with a tossed salad and corn on the cob. A nice summer meal!

Fried Zucchini

Zucchini squash is in season here in Maine and we picked up some yesterday from a farmer right down the road. We picked up 2 medium/large zucchini and 1 small/medium. I used the smaller one for friend zucchini last night kind of as an appetizer for my husband and I.

Fried Zucchini
1 small to medium zucchini
1 Cup Italian style bread crumbs
1 egg
2 Tbsp milk
Vegetable oil

Mix egg with milk, in a shallow bowl, until bubbles form. Place bread crumbs in a shallow bowl. Heat about 1 inch of vegetable oil in a pan on medium heat. Wash zucchini well, cut off ends. Slice zucchini in 1/8th inch slices. Coat slices in egg wash, then bread crumbs. Fry in oil until golden brown on both sides and tender. Drain well on paper towels. Serve with marinara sauce if desired.
Hubby's Rating:
Like it. I forgot to ask him tonight so I just had to call him at work and he seemed a little stressed....woops!

My Take:
I used to have this at least once a week when I was in college, in the dining hall. Then they stopped making it :(. But, I'm glad I thought of it for last night. It was soo good! And, the zucchinis were 3 for a $1...you can't really beat that, can you? Wait until you read what I make with the other two zucchini squash!

Sunday, July 25, 2010

Cake Recipe/Idea

Confounded Crafter: Goings On of Late

Just wanted to post this idea for a cake that I NEED to make!!

Here are some others, same idea...


Basically, it's a white cake (use a mix if you'd like), use food coloring, do whatever colors you want. Layer and frost and you're done! Looks so pretty!

Slacking....

Sorry I slacked a bit this weekend. Hubby was on call for work, so he's been all over the state of Maine and I've just been relaxing....I really have no excuse!!

So, I skipped the What I wanna Try Fridays and the Snack Time Saturdays. Sorry about that! Today I will combine both posts, but I'm going to do them out of order. Sound fair?

Snack Time Saturday

This week I made the best snack ever! And, I do believe it was the easiest to date!

Microwave Chocolate Cake
(with Strawberries and Cool Whip)

1 box chocolate cake mix
Oil, water and eggs as directed on box
Chocolate Chips
Cool Whip
Fresh Strawberries
1 Tbsp sugar


Mix batter for chocolate as directed on box (or make one from scratch, but what makes this easy is using the box mix). Now, using a Vent and Serve Container from Tupperware or the Heat and Serve Container, add either all of your mix or part of your mix, depending on the size of your container. Add chocolate chips to batter top, but don't stir in. Place cover on and cook in microwave 5 minutes, then 1 minute longer until cake pulls away from sides of dish. (I divided my batter so I made 2 cakes, each one took 6 minutes.)


While cake is cooking, slice strawberries and add sugar. Stir and let sit to create juices. Once cake is done, invert onto a dish and let cool. Add cool whip and strawberries before serving. Sprinkle with more chocolate chips if desired.


Hubby's Rating: Love it!

My Take: This is so simple and tasty there really isn't any complaint I can think of!! I wish I had a bigger Heat and Serve dish. I got mine as a hostess gift for holding a party. I am trying to work with my Tupperware Consultant to see if she can get me a bigger one!! As you can see from the post below, I really love this use for it!


What I Wanna Try Fridays

Microwave Pineapple Upside Down Cake

1 yellow cake mix, mixed as directed
1 small can pineapple rings
1 stick of butter
1 cup of brown sugar
Maraschino cherries

Melt butter in bottom of Tupperware dish. Sprinkle brown sugar evenly over the butter. Place the pineapple rings around bottom of the pan and place a cherry in the center of each pineapple ring. Pour in prepared cake mix and microwave 7 minutes on high. Reduce heat to medium power and microwave an additional 7 minutes. Take out of the microwave and let set about 5 -15 minutes. Invert onto plate, eat and enjoy!

Of Course, divide the recipe if you don't have the large container (and then go and bug your Tupperware consultant to see if she/he will let you buy a bigger one!).

Sunday, July 18, 2010

Italian Themed Dinner Night Version 2


Here's the second part of my italian themed dinner party. In the last installment, I covered our dessert and one of our drinks. You can find that entry here.

Tonight, I'll tell you about the appetizers.

Fried Ravioli and Stuffed Mushrooms

Fried Ravioli
1 pound frozen cheese ravioli, thawed
2 eggs
2 Tbsp milk
2 Cups italian bread crumbs
vegetable oil

Whisk eggs with milk. Dip raviolis in egg wash, then into bread crumbs. Heat 2 inches of oil in a dutch oven at 300 degrees. Place ravioli in oil and fry until golden brown. Remove from oil and drain on a paper towel. Serve with marinara sauce.


(Recipe adapted from Culinary cafe)

Hubby's Rating
:
Love it! Everyone loved these.


My Take
:
I made about 1/4-1/2 pound for everyone, but we could have eaten more! So if you have a large crowd, plan on at least the full recipe or double it! It took a really long time to thaw out the ravioli and I didn't plan on that. So make sure you give yourself adequate time.


Stuffed Mushrooms
4-6 strips of bacon, cut into bite sized pieces
8 ounces softened cream cheese
2 Tbsp chopped green onion
1 tsp spicy mustard
2 tsp dried oregano
15-18 large mushrooms, stems removed
and saved

Brown bacon in a skillet, drain on a paper towel. Mix all ingredients except mushrooms. Add mushroom stems to the mix if desired. Stuff mushrooms. Bake at 350 degrees for 18-22 minutes.

(recipe adapted from startcooking.com)

Hubby's Rating
:
Like it. He doesn't care for mushrooms, but he liked these. Everyone liked them, but not as much as the fried ravioli.


My Take
:
These were really easy to make. I have been looking for a stuffed mushroom recipe that did not contain shellfish for a while and this fit the bill! The original recipe called for a full POUND of bacon...I didn't feel the need to use all of that and it wasn't needed! No one missed all that bacon!


Saturday, July 17, 2010

Italian Themed Dinner Night

Tonight we had over friends and I did the Italian themed dinner night that I had been planning. It went off without a hitch and was fabulous! I am so pleased with the results...the food was great and the company was awesome!

Here is the menu:
Appetizers
Stuffed Mushrooms
Fried Raviolis
1st Course
Tossed Salad
Main Course
Spaghetti and meatballs and garlic bread

Dessert
Chocolate Trifle
Drinks
Strawberry Lemonade
Sweet Tea

I will spread the different recipes out over this week so as to not overwhelm my readers with recipes!

I'm going to go backwards and start with dessert and strawberry lemonade!

Chocolate Trifle
1 package brownie mix
1 large package instant chocolate pudding
1 cup heavy cream
1 large container of cool-whip
toffee chips, chocolate chips, chocolate shavings, etc. for garnish (optional)

Prepare brownie mix according to package directions, cool completely. Prepare pudding according to package directions. Whip heavy cream until peaks form. Fold cream into pudding. Start layering the trifle by putting crumbled brownies on bottom of dish, top with pudding mixture, then cool-whip. Repeat layers 2-4 times, depending on how big your trifle dish is. Refrigerate for at least 8 hours. Top with toffee chips (or another garnish) before serving.

(recipe adapted from allrecipes.com)

Hubby's Rating:
Love it! I'm making this again for a birthday party next week. I hope to get some good feedback!

My Take:
Really easy, but looks complicated. Tastes delicious! Everyone loved it, which makes me happy!


Strawberry Lemonade
1-12 ounce package of frozen strawberries, no sugar added, thawed
1-12 ounce package frozen lemonade concentrate, thawed
1 Cup vanilla simple syrup (recipe follows)
2 liters seltzer water
ice

Vanilla Simple Syrup
1/2 Cup white sugar
1 Cup water
2 tsp vanilla extract

In a small saucepan, over medium heat combine the sugar, water, and vanilla. Bring to a boil, then reduce the heat to a simmer. Cook, stirring occasionally, until the sugar has dissolved, about 5 minutes. Remove the pan from the heat and allow the syrup to cool, about 20 minutes.

In a blender, combine the berries, lemonade concentrate and syrup. Blend until smooth. Pour the mixture into a large pitcher. Refrigerate for at least 1 hour. Before serving, add seltzer water and ice. Garnish with a fresh strawberry or lime wedge if desired.

(Recipe Adapted from Giada De Laurentiis)

Hubby's Rating:
Like it. My man drinks coke exclusively. I can hardly get him to drink water, let alone lemonade or iced tea. Once in a blue moon he'll drink gatorade. So getting him to drink a pink girly drink and admitting that he likes it is a big feat! I think he even had seconds!

My Take:
This was gone real fast, which is a great sign! The original recipe called for only 3 cups of water, but it was too sweet. My friend helped prepare it and she ended up adding all 2 liters of seltzer water--I think it was perfect that way! I am going to try this again but with raspberries!

What I Wanna Try Fridays & Saturday Snack Time (combined post)

I wasn't feeling well yesterday, so one post was all I could muster. Today I'm combining the What I wanna Try Fridays and Saturday Snack Time.

First, Friday....

I want to try to make Sweet Tea and I have wanted to for a long time. The thing is, I'm not from the south, so it's kind of daunting to me. But, I finally found a simple recipe that I am going to attempt today. Tonight is the Italian themed dinner night, so I'll have reviews from others (seeing as my husband doesn't care for iced tea).

Smooth Sweet Tea
1 pinch baking soda
2 cups boiling water
6 tea bags
3/4 cup white sugar
6 cups cool water

Sprinkle a pinch of baking soda into a heat-proof pitcher. Pour in boiling water and add tea bags. Cover and allow to steep for 15 minutes. Remove tea bags and discard; stir in sugar until dissolved. Pour in cool water, then refrigerate until cold. Add ice if desired!

Recipe Adapted from: allrecipes.com


Now, Saturday....

Garlic Butter
1 cup butter or margarine, softened
1 Tbsp minced garlic
1/4 cup Parmesan cheese
1 tsp garlic powder
1 tsp italian seasoning
1/2 tsp ground black pepper

In a small bowl (I used my Tupperware Quick Chef), combine softened butter, minced garlic and parmesan cheese, mix well. Season with garlic powder, Italian seasoning, and pepper. Mix until smooth. Transfer to a bowl to refrigerate until ready to use. Use on bread, pasta, potatoes, etc.

(Recipe adapted from allrecipes.com)
Note: I followed the directions form the allrecipes version and it was too salty. I had to add about 1 1/2 tsp of sugar to help cut down on the salt taste. Next time, I will follow the above recipe to a T.

Hubby's Rating:
BEFORE adding the sugar: Not for me.
AFTER adding the sugar: Love it.

My Take:
Simple and sooo good! I LOOOVEEE garlic and this has the right amount! Can't wait to try it on some garlic bread this evening!

Friday, July 16, 2010

Korean BBQ Marinade

I made the marinade for this Wednesday, then let it sit in the fridge overnight by itself. Thursday mid afternoon I poured about 3/4 Cup over 2 boneless, skinless chicken breast (in my Season and Serve container from Tupperware), flipped the container a few times, then placed back in the fridge until it was time to cook! I served the finished chicken over a bed of noodles.

I tried my hand at searing once again. This time, after reading this article. Then, I baked the chicken breast for 20 minutes at 300 degrees F (using convection--350 for 30 minutes using conventional).

Here's the recipe!

Korean BBQ Marinade

1 Cup white sugar
1 Cup low sodium soy sauce
1 Cup water
1 tsp onion powder
1 tsp ground ginger
1 tsp garlic powder
1 tsp minced fresh garlic
2 tsp chopped scallions
1 Tbsp lemon juice

In a medium saucepan over high heat, whisk together first 7 ingredients. Bring to a boil. Reduce heat to low, and simmer 5 minutes. Remove mixture from heat, let cool. Whisk in lemon juice. Use as a marinade for chicken or as a sauce for stir fry, etc.

This recipe made enough for us to have it probably 2-3 times. I do not know how long it will keep in the fridge, but I suspect quite a while. I want to try it in a chicken stir fry next!

Hubby's Rating:
LOVE it! I was surprised by his rating. He's a really simple guy and isn't into the gourmet or ethnic foods. He could literally eat pizza every day of the week and he'd be happy. Not sure if he loved it because it was 10 o'clock at night and he hadn't eaten most of the day, or because he really did love it!

My Take: It was soooo good! The outside of the chicken was a bit crisp, but the instead was moist and wonderful. I can't wait to try it as a sauce for stir fry. I have been looking for a good stir fry sauce FOREVER!!

Wednesday, July 14, 2010

Pancakes and Blueberry Sauce

We had breakfast for dinner tonight, which is one of my favorite meals to cook. Tonight it was pancakes, hash browns and breakfast sausage. I also made blueberry sauce to go on the pancakes. If you've ever been to Maine, you know we use blueberries in a lot of different dishes, I think blueberry pancakes are a universal thing. I just wanted to put a twist on it. I know I'm not the first one that has made a blueberry sauce or syrup, but I still want to share it with you.
Also, you should know...this was my first time making pancakes by scratch--and they came out pretty darn good! The batter seemed a bit thick, but it worked!

Easy Pancakes
1 Cup all purpose flour
2 Tbsp white sugar
2 tsp baking powder
1/4 tsp salt
1 egg, beaten
1 Cup milk
1 tsp vanilla
3 Tbsp melted butter

Mix together all dry ingredients and make a well in the middle for the liquids. Mix the beaten egg with the rest of the liquids, pour into the bowl with the dry ingredients. Mix until smooth. Heat a griddle or a frying pan on medium high heat. Use a ladle to pour batter into pan (use about 1/4-1/2 Cup batter for each pancake). Flip once and allow to brown on both sides.

(recipe adapted from allrecipes.com)

Blueberry Sauce
2 1/2 Cups frozen wild blueberries (I use Wyman's brand)
1/2 Cup white sugar2 Tbsp water
1 Tbsp cornstarch mixed with cool water (optional)

Heat blueberries, sugar and water in a saucepan, stir often to prevent burning. Heat to boiling, let boil 2 minutes. Reduce heat and simmer 10 minutes to thicken slightly. If you'd like your sauce thicker, bring back to boiling and add cornstarch and water (as directed on the package). Let cool 15 minutes, then transfer to storage container. Serve over hot pancakes for a true Maine breakfast!

(recipe adapted from allrecipes.com)

Hubby's Rating:
Pancakes--Love it! I think we'll put these into our rotation for our weekend breakfasts. My husband is a French Toast man, so if he loves pancakes, they're good pancakes!
Blueberry Sauce--Like it. He isn't a huge blueberry fan, so he had his pancakes with Maine made maple syrup, but he tried the blueberry sauce from my stack.

My Take: I will definitely be making both again! I am surprised by how easy the pancakes were to make! I know they're super easy to cook, but like I said, I had never tried a recipe from scratch for them. I had everything on hand in the pantry, which makes the recipe even more appealing! The blueberry sauce was awesome! Now I am just trying to figure out what else I can use the recipe on! I have about 1 and 3/4 Cup left of the sauce....any ideas?

Saturday, July 10, 2010

Saturday Snack Time

Last Monday night after dinner, I made our snack of the week: Salsa! My first experience with "preserving" anything was the Strawberry Freezer Jam. I made that on a Saturday and decided to make the Salsa Sunday! I got 2 Cup freezer containers (2 packages) and mild salsa seasoning packet from Ball Mason. All I had to add was tomatoes! Later in the year, I may try again with all fresh ingredients.

Freezer Salsa
5 cans (14.5 oz) of petite diced tomatoes
1 Fiesta Mild Salsa Packet from Ball Mason
Freezer containers

Bring tomatoes with juice to a boil on high heat. Add seasoning packet. Stir and turn down heat to simmer for 5 minutes, stir frequently. Let cool for 30 minutes, then spoon salsa into containers (I used a ladle) within 1/2 inch of top. Cover and freeze up to 1 year. Or, store in fridge up to 3 weeks.

My batch filled 6 containers...so about 12 cups. I plan to use my batch for cooking and snacking as of right now (and I am giving 1 jar to my boss).

Husband's Rating: Like it. I have tried a fresh salsa recipe before (I might post that recipe at another date) which he didn't like, so I am glad he likes this.

My Take: Super easy and tastes so fresh. I can't wait to try it with all fresh ingredients! But, trust me, it's good--otherwise I would NOT be giving any to my boss!

Friday, July 9, 2010

What I Wanna Try Fridays

I love planning and I love entertaining. I am hoping to do an Italian themed dinner night pretty soon for friends. So, here are the recipes I want to try.

Drinks:
Best Party Sangria

1 Bottle of red wine (Cabernet Sauvignon, Merlot, Rioja, Zinfandel, Shiraz)
1 Lemon cut into wedges
1 Orange cut into wedges
1 Lime cut into wedges
2 Tbsp sugar
Splash of orange juice or lemonade
1 Cup of raspberries or strawberries (may use thawed or frozen)
1 Small can of diced pineapples (with juice)
4 Cups ginger ale

Pour wine into a large pitcher and squeeze the juice wedges from the lemon, orange and lime into the wine. Toss in the fruit wedges (leaving out seeds if possible) and pineapple then add sugar, orange juice and gin. Chill overnight. Add ginger ale, berries and ice just before serving. If you'd like to serve right away, use chilled red wine and serve over lots of ice. However, remember that the best Sangrias are chilled around 24 hours in the refrigerator - allowing the flavors to really marinate into each other.

Note: The original recipe called for gin or triple sec, but I will be leaving it out (it did say optional). We aren't huge drinkers except for wine or a beer now and then, so I don't want to buy something that will just sit and collect dust until one of us pours it out!

(recipe from about.com)


Appetizers:
Fried Ravioli and Stuffed Mushrooms

Fried Ravioli

1/2 lb. frozen ravioli, thawed
1 egg beaten
1 Tbsp milk
1 Cup bread crumbs
Vegetable Oil

Beat the egg with the milk. Fill a Dutch oven with two inches of oil. Dip ravioli into eggs and then coat with bread crumbs. Bring oil to about 300 degrees and fry about 4 to 6 ravioli at a time. Serve with marinara sauce.


Note: Recipe originally called for corn oil, but I am going to use vegetable oil instead because it's what we have in the house. I also cut the recipe in half because I will be serving 2 appetizers, but I want my guests to save room for the main meal and dessert!


(Recipe Adapted from culinarycafe.com)


Stuffed Mushrooms


1 pound of bacon

8 ounces of softened cream cheese

2 tablespoons of chopped green onions

2 teaspoons of dried oregano

18 large (stems removed) mushrooms


Preheat oven to 375 degrees. Cut bacon into 1 inch pieces. Fry until crisp and drain on a paper towel.

Mix bacon, cream cheese, green onion, oregano. Wipe mushrooms and remove stems. Fill mushroom caps with cream cheese mixture and place in baking dish. Bake 18-21 minutes or until fork tender.


Note: Original recipe calls for hot sauce, which I don't keep on hand because we never use it. Also, it says to "wash" mushrooms in directions. I was always taught to just wipe the mushrooms with a kitchen towel, so I adjusted the directions. Also, you should know I am very excited to try this recipe because I am allergic to shellfish (specifically lobster and oysters) and almost every other recipe I have come across calls for shellfish!


(Recipe Adapted from startcooking.com)


Also on the menu will be a tossed salad, garlic bread, spaghetti and meatballs (which is a family recipe), and possibly Tiramisu. I have attempted Tiramisu once before and it didn't come out. If any of my readers have a good basic recipe, please share! Otherwise, I might cheat and buy some from our local Italian Bakery!

Wednesday, July 7, 2010

Meatloaf, Roasted Potatoes and Roasted Corn on The Cob

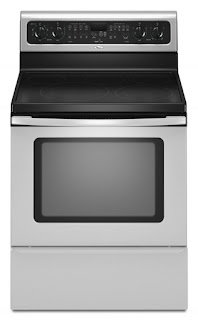
I got a new stove Monday and I wanted to try it out desperately. So, even though it was 95 degrees outside and 80 degrees inside (and really humid), and even though we usually do meatless Mondays, I had a to a classic meal in the oven!

First, here's my new stove!
I haven't used the Convect bake option yet, but I think I am going to make cookies this weekend!

Meatloaf
(I used the recipe on the back of the Lipton Onion Soup mix box for a change)
1 envelope onion soup mix
2 pounds ground beef
1 1/2 Cups bread crumbs
2 eggs
1/3 C ketchup
3/4 C water (if needed--I used 1/2 Cup and it was very moist)

Combine all ingredients in a large bowl and mix well. Place into a loaf pan (or muffin tin for individual servings). Bake at 350 degrees for 1 hour. Let sit 10 minutes before serving.


Oven Roasted Red Potatoes
4 Medium red potatoes, cleaned and diced (with skins)
2 Tbsp olive oil
Salt and Pepper to taste
Oven Roasted Corn on the Cob
2 ears of corn on the cob
1 Tbsp olive oil
Salt to taste

Potatoes and Corn Directions
Place potatoes on a cookie sheet in a single layer, drizzle olive oil over the top, season with salt and pepper.

Place corn on the other end of the cookie sheet. Drizzle with olive oil and turn corn to coat. Sprinkle with salt.

Bake at 350 degrees for 45 minutes.


Hubby's Rating:
Like it, he didn't have much to say about this one, just liked it!

My Take:
I liked it! Meatloaf was nice and moist. We got 1 meal out of it on Monday night, left overs Tuesday night and 1 piece was left over, which I had in a sandwich this afternoon.

Saturday, July 3, 2010

Saturday Snack Time

Today I made jam for the first time ever. It was surprisingly VERY easy!

I made Strawberry Freezer Jam with fresh strawberries from right down the road from me. I can't wait to enjoy my first container this week! It takes at least 24 hours to set up, then I want to have it chill in the fridge before I try it. So, the soonest we'll have it is Monday morning with our breakfast. I will edit this post with the rating as soon as I have it.

Strawberry Freezer Jam
(from Sure-Jell, CERTO)

2 Pints of Fresh Strawberries (2 Cups once hulled and crushed, no more, no less!)
1 Packet of CERTO Liquid Fruit pectin
4 Cups of Sugar (do NOT use Sugar substitute!)
2 Tbsp Fresh Lemon Juice


Hull strawberries and cut in half (cut larger ones in 1/4's). Crush strawberries with a potato masher, 1 cup at a time. Strain strawberry juice from fruit (you might need to do this several times to get all the juice out). The CERTO directions emphasize not using anymore than 2 cups of fruit and not any less.

Measure 4 Cups of white granulated sugar with a dry measuring cup, leveling off with the smooth edge of a knife. Place into a separate bowl from the berries.
Open CERTO Liquid Pectin packet and squeeze contents out into a liquid measuring cup. Mix in lemon juice.

Mix sugar with berries, stirring well to combine. Add liquid pectin and continue stirring until sugar is dissolved--it is okay if a few sugar crystals remain.

Spoon/pour (whichever is easier for you--I found little funnels specifically for this purpose, but not until after I made the jam!) jam into freezer safe containers (use 1 or 2 cup containers). Fill to within 1/2 inch of top. Screw on lids and let set for 24 hours. Freeze up to 1 year or keep in refrigerator for up to 3 weeks.

*I used Ball Mason plastic freezer jars, meant specifically for this purpose. They're surpisingly affordable and easy to find. They come in 1 cup, 1 pint and 1 quart sizes. I made 5 1 cup containers and then I had some extra that I didn't want to waste so I put it into a small 4 ounce tupperware container. The recipe from the CERTO box stated it would make 4 1 cup containers, so I'm not sure why I had extra.

Husband's Rating:
Hubby still hasn't tried it yet, but I will make him this week, ASAP!

My Take:
This recipe was SOO easy and the product is sooooo good! I am very happy with the results. Next I will attempt homemade salsa to freeze, less sugar freezer jam and raspberry freezer jam!

Friday, July 2, 2010

What I Wanna Try Fridays

I am going to dedicate Fridays to a post for what I want to try in the coming few weeks.

This week, let's revisit Megan's blog. I really want to try this recipe for Honey Oat Quick Bread, mmmm!!

Honey Oat Quick Bread

1 cup plus 2 tablespoons old-fashioned rolled oats, or quick-cooking (not instant) oats, divided
2 1/3 cups white whole-wheat flour (or use half white, half whole-wheat flour)
2 1/4 teaspoons baking powder
1/4 teaspoon baking soda
1 1/4 teaspoons salt
8 ounces (scant 1 cup) plain yogurt
1 large egg
1/4 cup canola oil
1/4 cup clover honey, or other mild honey
3/4 cup milk

Position rack in middle of oven; preheat to 375°F. Generously coat a 9-by-5-inch (or similar size) loaf pan with cooking spray. Sprinkle 1 tablespoon oats in the pan. Tip the pan back and forth to coat the sides and bottom with oats.

Stir together the flour, baking powder, baking soda and salt in a large bowl. Using a fork, beat the remaining 1 cup oats, yogurt, egg, oil and honey in a medium bowl until well blended. Stir in milk. Gently stir the yogurt mixture into the flour mixture just until thoroughly incorporated but not overmixed (don't overmix or the bread will be tough). Scrape the batter into the pan, spreading evenly to the edges. Sprinkle the remaining 1 tablespoon oats over the top.

Bake the loaf until well browned on top and a toothpick inserted in the center comes out clean, 40 to 50 minutes. (It’s normal for the top to crack.) Let stand in the pan on a wire rack for 15 minutes. Run a table knife around and under the loaf to loosen it and turn it out onto the rack. Let cool until barely warm, about 45 minutes.

The only substitution I am going to make is to use vegetable oil instead of canola, just because that's what I have on hand. But, when I do groceries next week, honey and plain yogurt will be on the list!

Happy Fourth of July Weekend everyone!

Thursday, July 1, 2010

Haddock

We usually save fish for Meatless Mondays, but I forgot to pull chicken from the freezer this morning and I didn't remember until 5:45pm when I was getting out of work, Uh-Oh! So I picked up some haddock that was on sale. We haven't had haddock in a while. It's a nice white fish with not a lot of fishy flavor, if you cook it correctly.

I asked the market owner for a simple recipe to try. I didn't want to come home and look for a recipe on-line and find out I don't have all the ingredients. The market owner told me what to do, but didn't give me any measurements. So, here is what I did.

Seared Haddock
1/2-3/4 lb Fresh Haddock
2 Tbsp Butter
2 Tbsp Olive Oil (NOT EVOO)
Juice from 1/2 medium lemon

Heat cast iron skillet on med-high with oil and butter. Once butter is melted, add haddock. Sear for 2-3 minutes, then repeat on other side. Cover pan, turn down heat to med-low and let fish cook for 10-15 minutes. Plate and squeeze lemon over haddock, serve with a fresh salad.

Husband's Rating:
Love it! My husband is a HUGE fish fan. He loves haddock, salmon, trout, tuna and swordfish. AND he loves fishing. So, although he didn't catch the fish we had tonight, he was very happy with it.

My Take:
I liked the flavor of the fish, but as I was searing it, it fell apart. I'm not sure if my pan wasn't hot enough, or if the fish wasn't thick enough. But once it fell apart that first turn, there was no going back. I would have liked more seasoning--maybe lemon pepper, maybe just a dash of pepper...something to spice it up a bit. But, hubby loved it, so we'll probably try it again in another 2-3 weeks.


I served the haddock with a salad of fresh romaine hearts. It was soo good! I didn't feel like having any of the dressings we had in the fridge (and we have a wide selection). So I decided to make my own. I've made deli spreads (dijonaise, chipotle mayo, etc.) before, but never my own dressing. I didn't follow a recipe, just went with what I thought would taste good.

Sweet and Sour Dijon Dressing
(enough dressing for 2 medium sized salads)
Juice from 1/4 of medium sized lemon (if making this dressing to go with haddock, just use some of the leftover lemon juice from above recipe)
1 Tbsp Dijon Mustard
1 tsp Brown Sugar
1 tsp Olive Oil

Add more or less brown sugar and lemon juice for your tastes.

Husband's Rating:
Hubby doesn't eat any dressing except italian and french, so he didn't try this dressing, sorry there is no hubby rating!

My Take:
I loved it! Tomorrow I will add a bit more brown sugar, or try some honey (we didn't have any on hand this evening). Kind of glad I wasn't into any of the dressings we had already!

Wednesday, June 30, 2010

Next attempt!

I've tried a couple different blogging attempts, but nothing I was able to stick with. I tend to forget my camera when I need it, life gets in the way, etc. I could come up with 100 excuses! But, yet, here I am again, ready for new adventure. This time, I'm focusing solely on food--which is my passion. I love cooking! I get it from my mom. I've been sharing my cooking with my husband for almost 4 years and now I am ready to share with you all!

You'll find easy recipes, family favorites, kid friendly, desserts, entertaining recipes and more. When I come across a new recipe and try it, I'll let you know how I like it! And, to add another element, I will have my husband rate it--Love it, Like it, Not so much...

So, here's our first recipe....Sloppy Joes!

I took a similar recipe from this blog and changed it up a bit. No offense to Megan or her grandmother, but 1.) we like sloppier sloppy joes and 2.) I just wanted to put my own spin on it!

Here we go...

Sloppy Joes
1 lb of ground meat (I used ground turkey)
1 small purple onion
1 Tbsp minced garlic
1/2 small green pepper
3/4 Cup Ketchup
1/2 Cup turkey stock (use beef stock if you're doing hamburg, chicken if you're using ground chicken...if you don't have stock on hand, just use water)
1 Tbsp Mustard
1 Tbsp Brown Sugar
3 Tbsp Sweet Relish
1 1/2 tsp Chili Powder

Start by putting your skillet on medium high heat. Dice onion and green pepper (I like using my Tupperware Quick Chef for this), add to pan with minced garlic. Add ground meat once garlic is fragrant--make sure not to burn garlic, it will become bitter. While meat is browning, mix together remaining ingredients in bowl or measuring cup. Add to browned meat in skillet, turn to medium heat. Let simmer for 8-10 minutes or until everything is heated through.

To serve, spoon onto warmed hamburger buns.

Because I had worked all day and came home late, I just picked up generic hamburger buns from the store, I may attempt to make my own soon.

Husband's Rating:
Like It
(Which means we'll have it about once a month unless he requests it more.)

My Take:
I enjoyed the recipe. It was really simple to whip up after a long day of work. My husband had 2 sandwiches and I had 1, there was enough left over for about 3 more sandwiches, so that's a plus. I froze the leftovers for more sandwiches later. I do wish the sauce had more tangy-ness to it. I will fiddle with the recipe again in a few weeks and post any changes!